

Friday, November 29, 2013
BLACK FRIDAY SALES!!!!
DENY Designs are having a massive sale of ALL their items throughout the day!! Check Facebook today for your discount codes!! And don't forget to 'like' in order to receive updates about this sale and more on the lead up to Christmas!!

Thursday, November 28, 2013
Phetberg Launch
Hello all!
I have something exciting to announce (which if you've been following on Facebook you may already be aware of)!! I've been working with a menswear company called Phetberg for a while now developing one of my designs for use on their beautiful pocket squares!!
They finally launched their 2014 collection earlier this week so without further ado here are the pics!


All Phetberg pockets squares are 100% silk and hand rolled. All manufacturing processes take place in Como, Italy and are quality checked in Vienna, Austria. For more information about this pocket square please click here.
To see all this seasons pocket squares click here!
Tuesday, November 19, 2013
Modern Living
I haven't done a post like this in a while so I thought I would today :)
I'm never really sure what people mean when they use the word 'modern' to describe a room. I guess they mean something that hasn't been done before, something new. The word 'modern' tends to conjure images like this

but as far as I can tell these kinds of spaces have been around for at least the last 10 years so what's so modern about them?! Is it the clean lines? The black and white colour scheme? The total lack of clutter? The perfectly coordinated accessories?! I guess these things are what makes this room modern but I would like to suggest a different definition. I feel as though we're heading further and further from this minimal, ultra coordinated look and much more in the direction of revival and mixing old with new. This to me is a much more modern (and forgive me for saying so, more interesting) way of styling a room. Here's why...
Make-do-and-mend
There's no doubt about it, living in a recession sucks! However if there's one good thing to come out of it it's creativity! People can't afford to toss all their old furniture when they feel like a change, they have to work with what they've got. This has resulted in some fantastic re-purposed or revamped furniture. Just check out these examples! |
| Colourful chair make-over courtesy of casadeestar.com.br |
 |
| Coffee table made from re-purposed crates courtesy of homedesignboard.com |
People are less able to get exactly what they want, whether it's a small accessory or a big piece of furniture so they get creative! This kind of thinking has resulted in much more eclectic home decor styles. Homes are starting to look far less uniform as people make more unique decisions about not just what they buy but how they use and reuse it. The make-do-and-mend mentality is fast becoming a way of life and it's the homes that reflect this that I feel truly deserve the title 'modern.'
And because no post of this nature would be complete without them, here come the inspiration boards!
Modern Living Room
I really enjoy the freedom of this kind of decorating. Use what you have, experiment and see what you can get away with. You might be surprised how chic those old ornaments look once you take them out of the cupboard and arrange them on your mantle with a few of your favourite books. Even your old couch can look cool again with some funky new throw pillows tossed over it!
Shop the Look:
1) 'April' throw pillow by Sophia Buddenhagen 4) 'Decorative Blue' throw pillow by Aimee St Hill 2) 'Amirah Red' throw pillow by Aimee St Hill 5) 'Ogee Green' tray by Aimee St Hill
3) 'Colorful Thoughts' art print by Bianca Green 6) 'Como 1' rug by Aimee St Hill
Modern Bedroom
Need a new headboard? Why not simply paint the one you already have! Better yet, buy a great piece of fabric and give it a padded make-over! Remember colour is your friend! Don't be afraid of combining unusual accessories, be bold with your choices! The more creative you can be, the more 'modern' your space will look!
1) 'Delilah' art print by Samantha Totty 4) 'Leela Navy' throw pillow by Aimee St Hill
2) 'Eve' art print by Samantha Totty 5) 'Geo Floral' blanket by Aime St Hill
3) 'Stripe2' throw pillow by Aimee St Hill
Modern Bathroom
Wallpaper is great way to update and bring character to your bathroom. If papering the entire room is out of your budget try simply covering a cabinet! Not only will it liven things up but it'll give the room a focal point. For a really modern look try adding additional furniture to your bathroom if you have the space. I just love how this old stepladder turned side table ties in with that unique Brian Yates wallpaper!
Shop the look:
1) 'Teal' shower curtain by Bianca Green 4) 'Bright Tribal' shower curtain by Aimee St Hill
2) 'Amirah Blue' mirror by Aimee St Hill 5) 'Bright Roses' mirror by Aimee St Hill
3) 'Pattern Aqua' mirror by Amy Sia
So here are a few things to remember when it comes to modern decor. Thinking outside the box is key! Be bold with your choice of colour, embrace the unconventional (it's ok that things don't match) and don't be afraid to blend old with new.

I hope you've enjoyed today's post! I've got a few more furniture make-overs up my sleeve so keep a look out for them! Until then, happy decorating :)
Image Credits:
http://sannaochsania.blogspot.se
Uploaded to pinterest
http://www.apunchofcolordesign.com
http://www.vintagerevivals.com
http://www.redbookmag.com
http://www.housetohome.co.uk
http://lamusadecoracion.blogspot.com.es
Wednesday, November 13, 2013
Keka Case Product Launch
Hi guys!!
I'm very happy to be able to officially announce the launch of a brand new line of products at Keka Case!! This is the first (but hopefully not the last) in a line of tablet covers which will be available to purchase not just in the US and Canada but also in the UK!! Even better for my peeps in England this will mean FREE SHIPPING on select items!!

 Keep a look out in the next few weeks for the launch of my phone cases at Keka Case!! In the meantime you can enjoy buy 2 get ANY snap-on-case FREE when you use discount code FREESNAP at checkout!!
As if all that wasn't enough DENY Designs have just launched a whole heap of new products in preparation for the holiday season!! If you've not done so already head over there now to check out their snazzy new site along with the complete collection of these bad boys!!

For all Aimee St Hill pet accessories click here, for trays click here and for all coaster sets click here!
Thanks for stopping by! Happy shopping :)
I'm very happy to be able to officially announce the launch of a brand new line of products at Keka Case!! This is the first (but hopefully not the last) in a line of tablet covers which will be available to purchase not just in the US and Canada but also in the UK!! Even better for my peeps in England this will mean FREE SHIPPING on select items!!


As if all that wasn't enough DENY Designs have just launched a whole heap of new products in preparation for the holiday season!! If you've not done so already head over there now to check out their snazzy new site along with the complete collection of these bad boys!!
Thanks for stopping by! Happy shopping :)
Monday, November 11, 2013
Rattan Rocker Revival
Hello!!
Today I'm excited to be able to post another furniture make-over!! This time a living chair to go with my yellow couch.
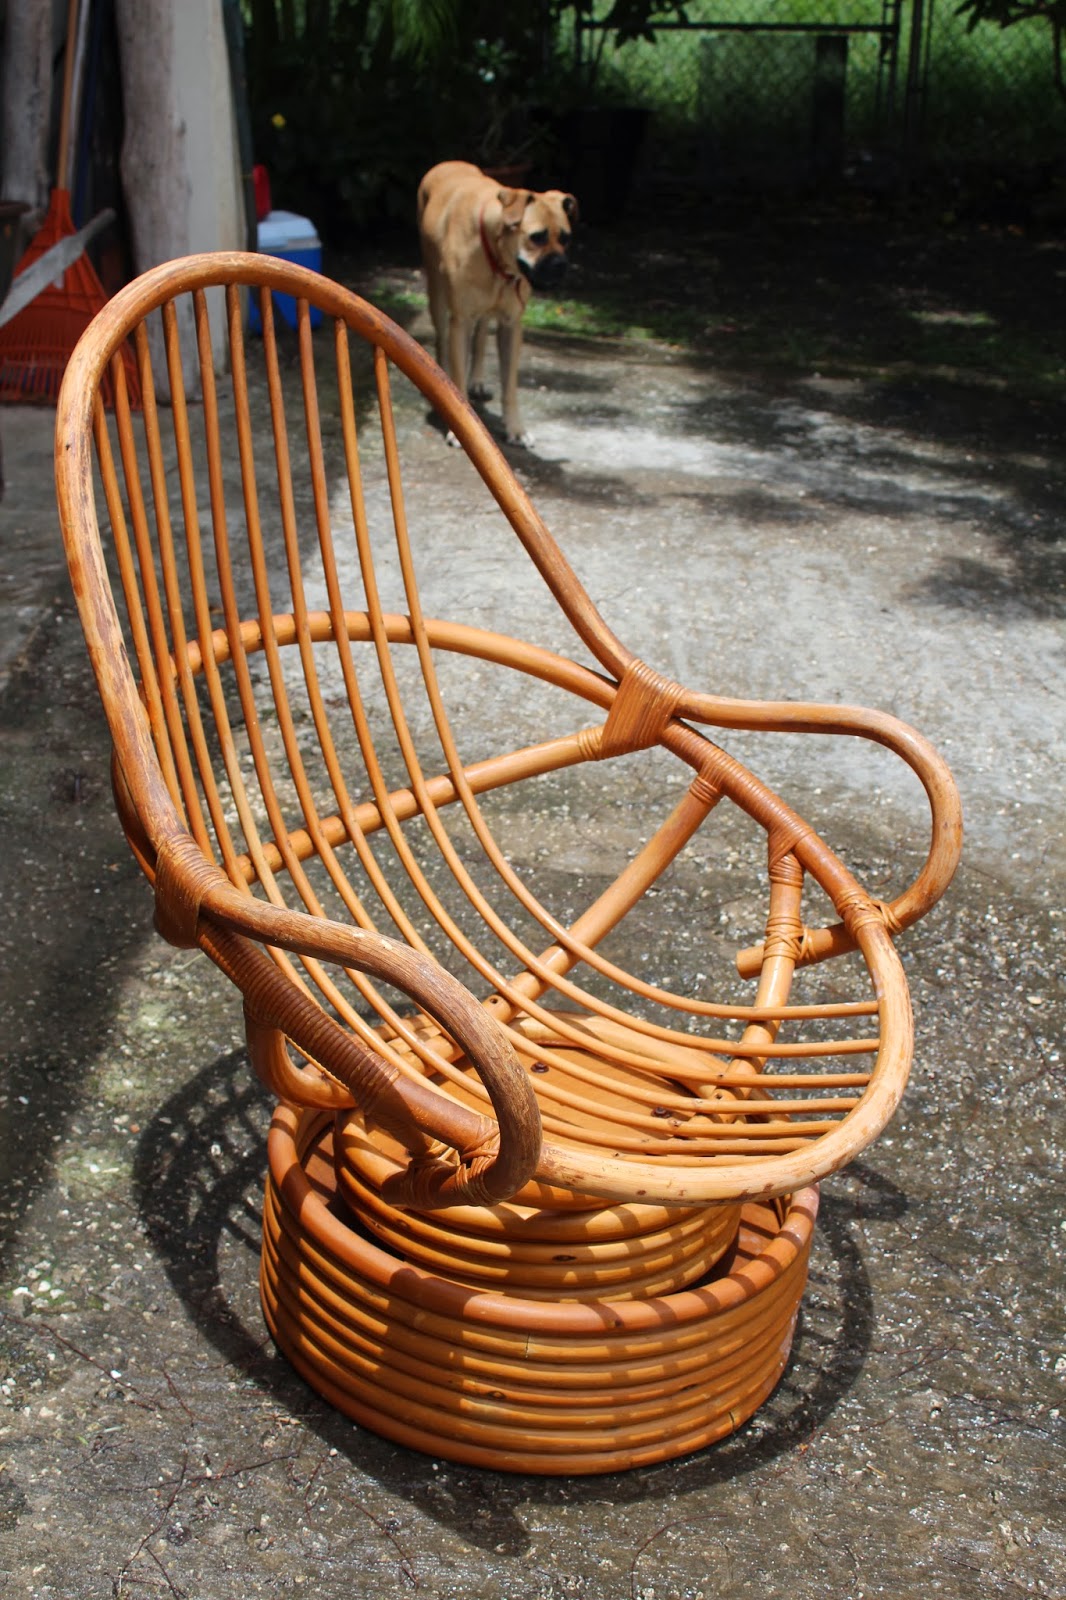
I found this super cool chair in my boyfriend's parent's basement and immediately decided it would be perfect in my living room!

First I hauled it out of the basement (after getting permission of course) and gave it a good clean! The dog didn't help, she has NO respect for personal boundaries!

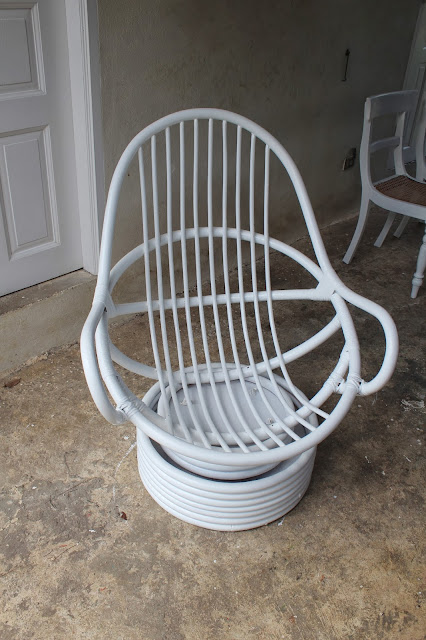
Then I painted it white! I started with a coat of primer then added two coats of semi-gloss, water based emulsion. I had a little of the automotive painted left after finishing the table so I gave it a quick once over with that and voila!

I had intended on making this a 'How-to' but I became very self-conscious about my technique (or lack there of) about half way through and decided it's probably better for everyone that I don't write instructional posts when it comes to construction!! If you're looking for instructions with clear, logical steps you should visit The CSI Project. She covered a bench not a chair but it's the same principle. Plus she has a totally cool foam carving knife which I seriously wish I owned!!! The foam under my cushion covers look a lot more like I let a dog chew them into shape rather than carefully cutting them myself!!! Thank goodness for wadding (batting if you're in the US)!!!
I love my new living chair and think it looks great with the couch! :)


I'd also like to draw your attention to one of my cushions (the only one I didn't get from IKEA)!!

I'm super excited about it for two reasons, 1) I made it using a tapestry set which took several months and 2) I get to tell you guys about this incredibly cool online craft store I discovered!!!
Felicity Hall produces modern tapestry sets!!! It's sooooo cool! She has a whole bunch of designs in different colours. They are so fun to do and soooo much more interesting than the traditional tapestries we're all used to seeing! Here you can see how the flat tapestry looked when it was finished!

And finally a little promo of my products! :) You may not have even noticed it in the picture but one of my Kess Inhouse throw blankets made it's way to my living room recently!

You can find it here!
Thanks for stopping by!! Oh, I almost forgot the all important before and after photo!!!

Until next time don't forget you can now follow me on Pinterest to keep up with my latest products, inspirations and now home make-overs too!!
Today I'm excited to be able to post another furniture make-over!! This time a living chair to go with my yellow couch.
I found this super cool chair in my boyfriend's parent's basement and immediately decided it would be perfect in my living room!
Then I painted it white! I started with a coat of primer then added two coats of semi-gloss, water based emulsion. I had a little of the automotive painted left after finishing the table so I gave it a quick once over with that and voila!

It was looking pretty good at this point but it wasn't the most comfortable thing to sit on! I wasn't much liking my chances of being able to remake the original cushion either. It's a pretty odd shape to make a cushion for, what with the round piece and then the odd kinda sloping angle of the arms. Not easy!
For anyone with a similar chair and more accomplished sewing skills I would recommend this pattern. I was excited to find it but not quite confident enough to execute it! Instead I cut two pieces of foam in a kind of deep D shape and slapped together a couple of covers for them!
At first I considered just buying a yellow fabric to match the couch but I couldn't find the right yellow so I decided to co-ordinate with some of my throw pillows instead! I found this great fabric at
Sanderson. It's a liiiittle bit pricey but luckily I didn't need much to cover the foam!
I had intended on making this a 'How-to' but I became very self-conscious about my technique (or lack there of) about half way through and decided it's probably better for everyone that I don't write instructional posts when it comes to construction!! If you're looking for instructions with clear, logical steps you should visit The CSI Project. She covered a bench not a chair but it's the same principle. Plus she has a totally cool foam carving knife which I seriously wish I owned!!! The foam under my cushion covers look a lot more like I let a dog chew them into shape rather than carefully cutting them myself!!! Thank goodness for wadding (batting if you're in the US)!!!
I love my new living chair and think it looks great with the couch! :)

I'd also like to draw your attention to one of my cushions (the only one I didn't get from IKEA)!!

I'm super excited about it for two reasons, 1) I made it using a tapestry set which took several months and 2) I get to tell you guys about this incredibly cool online craft store I discovered!!!
Felicity Hall produces modern tapestry sets!!! It's sooooo cool! She has a whole bunch of designs in different colours. They are so fun to do and soooo much more interesting than the traditional tapestries we're all used to seeing! Here you can see how the flat tapestry looked when it was finished!

And finally a little promo of my products! :) You may not have even noticed it in the picture but one of my Kess Inhouse throw blankets made it's way to my living room recently!

You can find it here!
Thanks for stopping by!! Oh, I almost forgot the all important before and after photo!!!

Until next time don't forget you can now follow me on Pinterest to keep up with my latest products, inspirations and now home make-overs too!!
Wednesday, October 30, 2013
Couch Makeover
Hey guys!
I was lucky enough to be given a couch (in fact quite a bit of furniture) for my big move! And since the table turned out so wonderfully I figured why stop there!
The picture below is not the best example of this couch before. It did have cushion covers when I received it but I had removed them (for reasons you will find out later) so unfortunately this is the only 'before' picture I have.

I was eager to get started on the painting but first I had some mending to do!
I'm not sure the picture below does the sagginess of the seat justice but trust me it was a pretty sad looking frame. Luckily it was an easy fix!

First I removed each section from the base of the chair and cut all the old fabric away so that I was left with a basic wooden frame.

 Then I cut a piece of cotton canvas a couple of inches larger than the frame. I placed the frame in the centre of the fabric and beginning at one edge I folded the fabric under and stapled it to the wood.
I continued folding and stapling in this way along one whole edge before moving on to the opposite edge and sides, pulling the fabric tightly to ensure the surface was taught.


I kind of made it up as I went along when I came to the corners. Basically I cut away any bulky extra fabric and folded one side under the other so that it was nice and neat.

Here's how the frame looked with the new canvas seat!

I knew this was gonna be nightmarish to paint by hand (what with the lack of flat surfaces and all the tiny, difficult to get to crevices) but I'd run out of my trusty automotive paint and unfortunately another mixture was just a teeny bit out of budget :(
I figured I would have needed about a million cans of spray paint and probably some expensive finger surgery if I'd decided to go down the spray can route. Instead I used a semi-gloss emulsion and a paint brush.
It took 3 coats of paint including primer and two days (along with some fairly serious sunburn) to finish but it turned out great!

As you can see I didn't bother to paint the inside. That section of the frame is hidden under the seat of the couch and can't be seen from the outside.
Once the frame was looking snazzy it was time to tend to the cushion covers! Remember I said I would get to those!? Well here they are!

I used Dylon Sunflower Yellow dye and 500g of salt (to fix the colour). Dylon is very easy to use and gives great results when the instructions are followed correctly. I've dyed a lot of things over the past few years and I've learned that when using a single colour in the washing machine it can't hurt to add a little more dye than you need! I wanted a really strong yellow so that's exactly what I did!

I used 3 boxes of dye for 6 cushions and the result was better than expected!! See for yourself!


I think you'll agree it's a HUGE improvement!!! :D
Juuuuuuust in case you need more convincing here's the before and after of the whole couch!

Note: If you're worried about dye being left in your washing machine try
running an empty cycle when you're finished. This will get rid of any
residual dye that may have been left behind in the drum!
That concludes my couch makeover!! Thanks for reading!!! :D
I'll be posting more furniture refurbishments over the next few weeks so keep your eyes peeled!
Sunday, October 20, 2013
Table Makeover
Hellooo!!!
I've been super busy over the last few months but I have some exciting things to tell you all! I've become absolutely obsessed with furniture make-overs on Pinterest and I've finally had a chance to do some of my own!!! Eeeeeeee!!!
I've wanted to take a sander and some paint to the table in my workspace for some time now and a few weeks ago I finally got my chance! I'm moving to a new place and thought it would make the most perfect dining table!
I found this great post on Centsational Girl and proceeded to follow the instructions...mostly...
My table took somewhat longer to clean and sand since it was pretty beaten up. Here's the all important 'before'!


A couple of years worth of ink and masking tape will do that to a table. Here it is with all the grime cleaned off it!

Anyway, Once I'd extracted the masking tape from the table and removed most of the ink and dye (I found nail polish remover did the best job of this as well as removing the sticky residue left by the tape) I began sanding!

I didn't have an orbital sander but a palm sander seemed to work pretty well for most of the table. I actually ended up doing a lot by hand especially around the edges and in other areas that weren't flat. I don't know much about sandpaper grades but I used the roughest one I could find and it made easy work of some of the more stubborn blemishes.

There were a few holes in the wood which I wanted to get rid of before painting. I filled these with putty! I didn't do any research on which one was best, I just used whatever I had lying around. This one was really easy to apply, you just use it straight out of the tub and smush it into the holes with a palette knife (or something with a flat edge). Then you can paint over it!
I applied two coats of primer with a sponge roller, sanding in between each to ensure a nice smooth surface. I was able to complete both coats in one day as it was very quick drying!
Here is my table after two coats of primer! I think you'll agree it looks a lot better! Those lines you can see across it are where the putty filled the holes.

The following day I began painting! I used a semi-gloss emulsion which I applied with the same foam roller for three coats, leaving 24 hours between each. I wanted to avoid brush strokes on my table but ended up getting an equally annoying orange peel finish. Only later did I discover that you should never use a roller to apply gloss paint! Typical.
This is how the table looked when it was finished. I should mention that I painted the table while it was open like that because I didn't want the sections to stick together. I don't know if that's a thing but I think it's better to be safe than sorry!!

I observed the three day curing time before applying a paint protector (in fact I didn't touch the table for 6 weeks because I went on holiday)! Unfortunately everyone was not quite as respectful of my table and when I returned there were a few marks and dings in it. This is why we can't have nice things!!!
I wasn't convinced that the wax recommended on Centsational Girl would give my table the kind of protection it obviously needed against my boyfriend and his general (but somehow loveable) carelessness. I considered Polycrylic but was warned that it might yellow over time. Knowing I wanted to avoid this my aforementioned boyfriend suggested something that would give me a completely flat finish whilst being ultra durable - automotive paint!!! I'm in love with this stuff!! It's quite a bit more pricey and you do need a special spray gun to apply it but it's so much fun to apply and the finish is totally worth it!


Make sure to follow all the instructions on the tin carefully (it needs to be mixed in very specific measures) and always spray in a well ventilated area WITH a face mask!!! This isn't your regular spray in a can!! If you spray in thin even layers, building them up slowly you end up with a gorgeous glossy finish with no drips, no brush strokes and no bobbly orange peel sections. Just lovely glassy (sturdy) paint! :)
This is the finished table (with the middle section removed)!!!!

I can't wait to show you how it looks with the chairs!! In fact I'm gearing up for an entire room reveal so keep your eyes peeled!!
Subscribe to:
Comments (Atom)